How to Make a Zine: A Kid-Friendly DIY Guide
by Celia C. Pérez
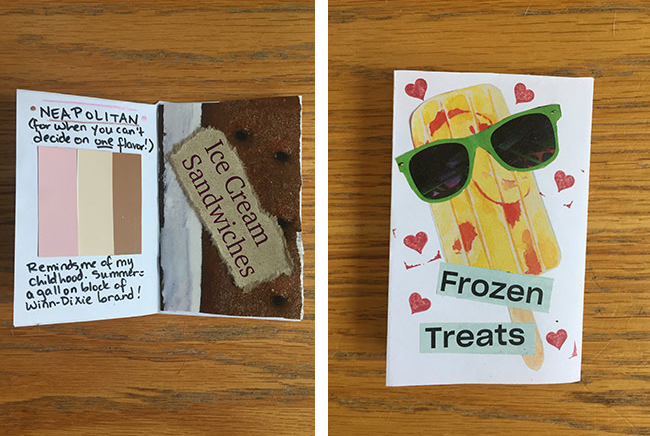
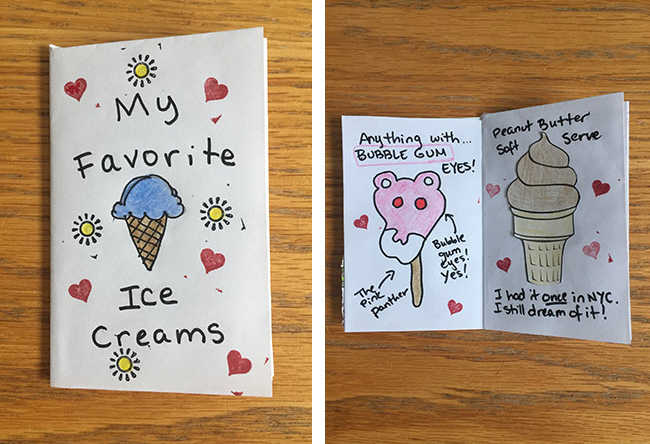
A zine, pronounced “zeen” (just like the end of the word magazine), is a homemade publication. There are no set-in-stone rules for making zines. A zine can be about anything you’re interested in. Really! There are all kinds of zines including: fanzines (a zine about something or someone you love), cooking zines full of recipes and tips, comic zines, art zines, poetry zines, and personal zines where people write about their daily lives. I once saw a zine that was created to look like sticks of chewing gum inside a wrapper! The content and appearance of a zine is completely up to the creator and can be as simple or as complicated as you want.
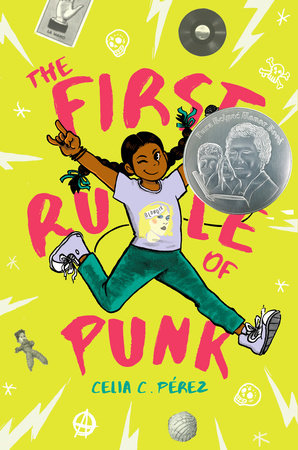
In my middle grade novel, The First Rule of Punk, 12-year-old Malú makes personal zines to explore the things that are happening in her life. She writes and uses a combination of collage and drawings to document her feelings about leaving her home and moving to a new city, learning about her Mexican heritage, her love of music, and even dyeing her hair.
Making a zine is all about self-expression and creativity. Sound good? Okay, let’s get to it!
Supplies
These are all you really need:
- Paper
- Something to write with
- A pair of scissors
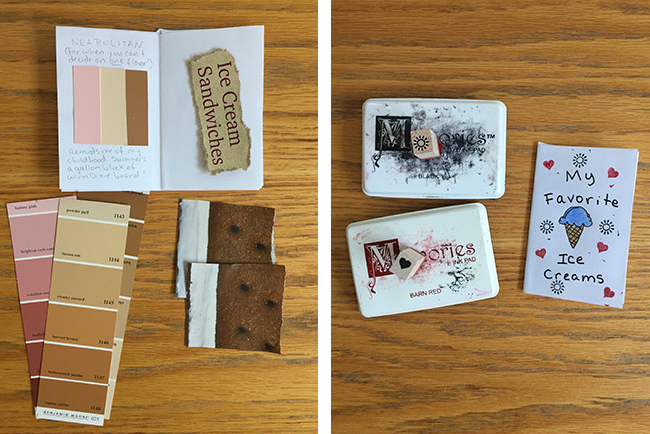
Extra Supplies
The sky’s the limit, really, but here are a few things I like to use:
- Glue stick
- Colored pencils (or crayons)
- Rubber stamps
- Washi tape
- Stickers
- Old magazines
- Old stamps
- Paint chips
- Security envelope linings
- String or yarn
Instructions
Step 1: Fold your sheet of paper in half. Fold it again into quarters, and then one more time so that it is folded into eighths.

Step 2: Open your paper so that it is folded in half. Cut halfway across the middle from the fold. When you open your paper it should have a slit in the middle.

Step 3: Fold your paper lengthwise (along the crease that has the slit). Hold the paper at either end, then push the ends in toward each other. The sections should fold into each other to form an eight-page booklet.

Step 4: Now it’s time for you to fill in your blank booklet and turn it into a zine! How you fill it in is completely up to you. You can plan or sketch out your content before making it final, or just wing it. Use the basic supplies only or add extra elements. If you want to just write and not use images, that’s cool too.

Step 5: And that’s it! You can keep it for yourself, give the original away as a one-of-a-kind gift, or make copies to share with your friends. Either way, you’ve made your first zine!