How to Make an Origami Book
by Dena McMurdie
Hand-crafted books make beautiful, personalized gifts. These mini origami books are super adorable and much easier to make. Here’s how to create your own!

What You’ll Need:
- Blank paper
- Scissors
- Scrapbook paper or cardstock for cover
- Glue
What to Do:
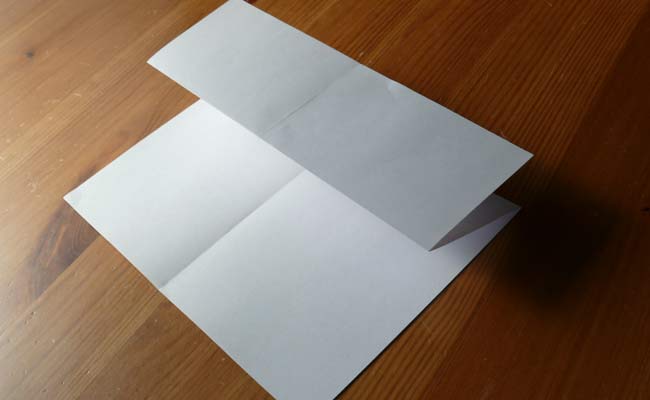
Step 1: Take a blank piece of paper and fold it in half lengthwise so it makes a long, skinny rectangle. Open the paper back up.

Step 2: Fold the paper it in half widthwise so it makes a short, fat rectangle.

Step 3: Fold the top flap in half, aligning the bottom edge of the paper to the top fold.
Step 4: Flip your paper over and do the same to the other side. Your paper should form a W shape.

Step 5: Use scissors to cut along the center crease, stopping at the valley of the W.

Step 6: Fold the paper in half, following the previously made creases.

Step 7: Bring the sides together to form a booklet.

Step 8: To make the cover, lay the book open on the back side of a sheet of scrapbook paper or cardstock. Trace the outline of your book.

Step 9: Cut out your cover and fold it in half. Run a small amount of glue around the inside edge of the cover and slide the booklet inside. You may need to press the finished book under something heavy (like another book) for a few minutes.

All done! You can leave it the way it is or add embellishments to make it your own. If you used blank cardstock for the cover, draw your favorite comic-book character on the front or add wiggle eyes, feathers, and a beak to make it look like a bird. Make a collage of your favorite photos, or decorate it with glitter glue, markers, or stickers. Use your imagination!

Want a book with more pages? Make multiple booklets by following steps 1-7, glue the booklets together, and then add your cover. Just make sure your cover is big enough to hold all your pages inside.